How to Upload a Video to Livepeer Studio


Uploading a video to Livepeer Studio is simple, and takes just a few minutes. Here are step-by-step instructions to upload a video to Livepeer Studio.
Step 1: Create a Livepeer Studio Account
First, navigate to livepeer.studio. Next, click on “Let’s Go” in the top right corner. If you already have a Livepeer Studio account, log in here.
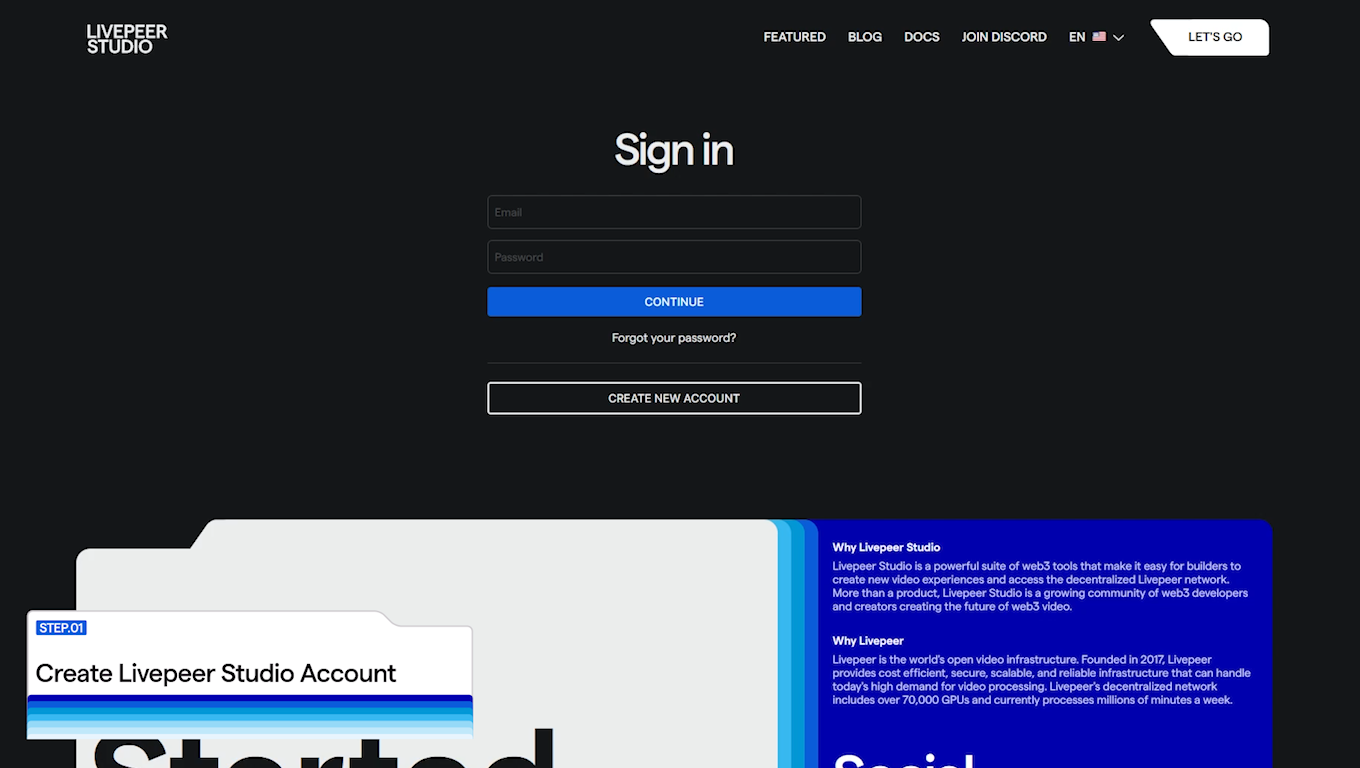
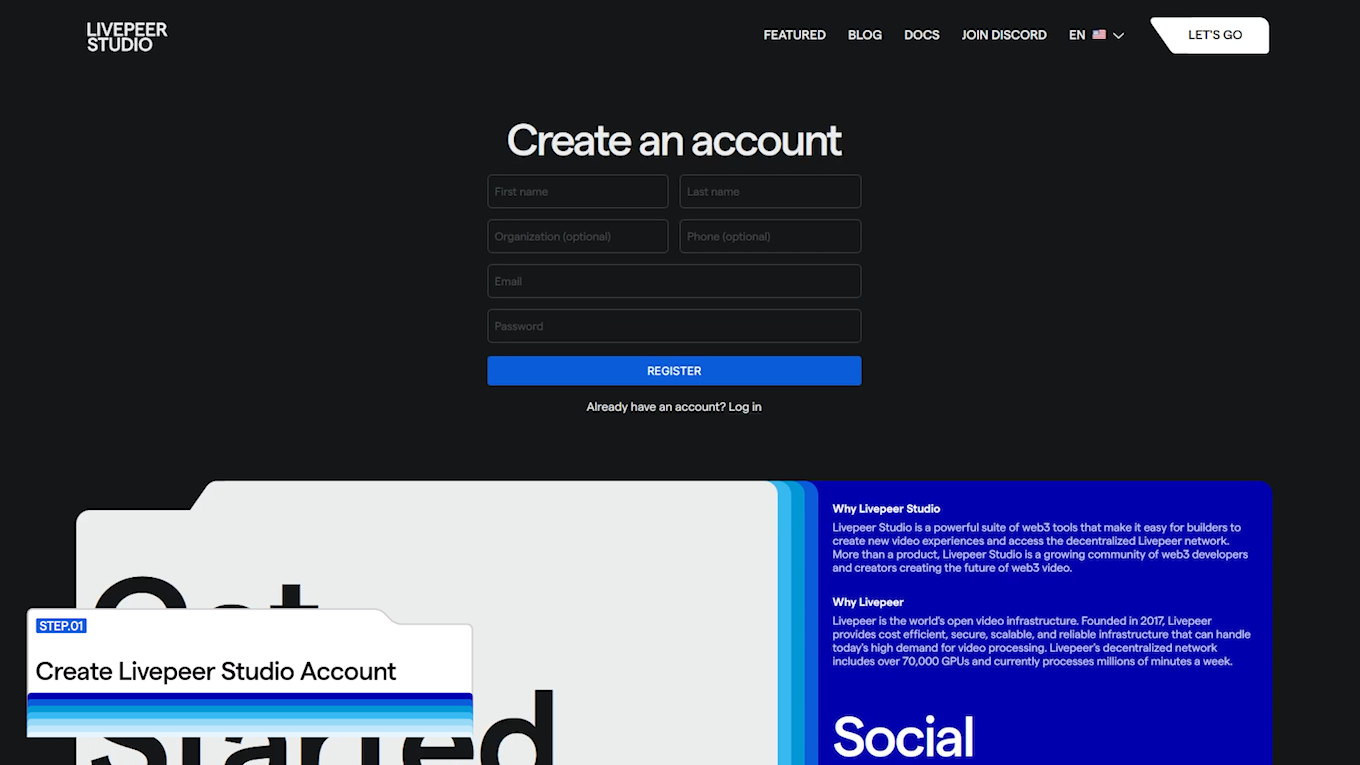
If you don’t have an account, click “Create New Account,” and fill out the required information. Make sure to check your email to verify the account.
Step 2: Upload a Video Asset
After logging into your Livepeer Studio account, you will be directed to the dashboard. Click “Assets” in the menu located on the left side of the page. Then, click “Upload Asset.”
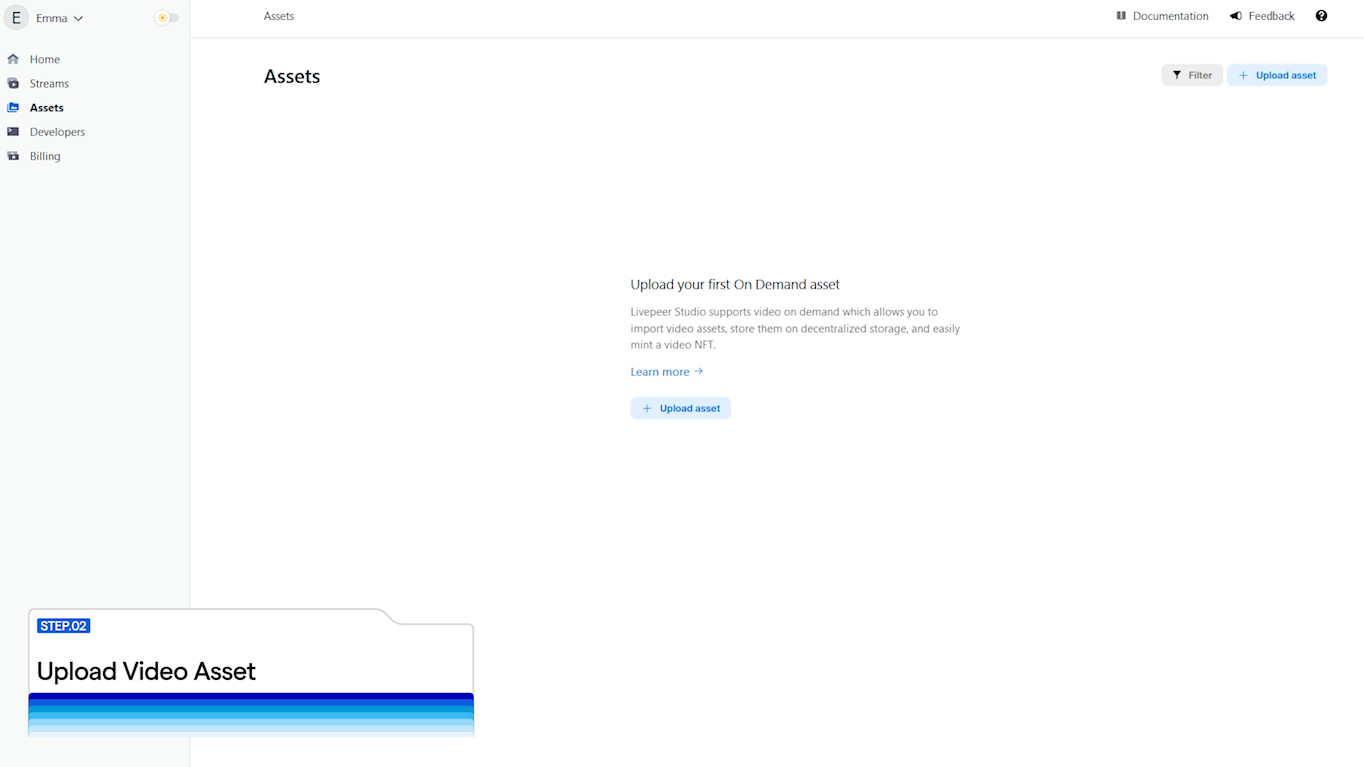
You will be prompted to select (or drag and drop) your video asset. You can upload MP4 or MOV file formats, and can upload up to 20 files at a time. Once you have selected the desired video files, click “Upload.”
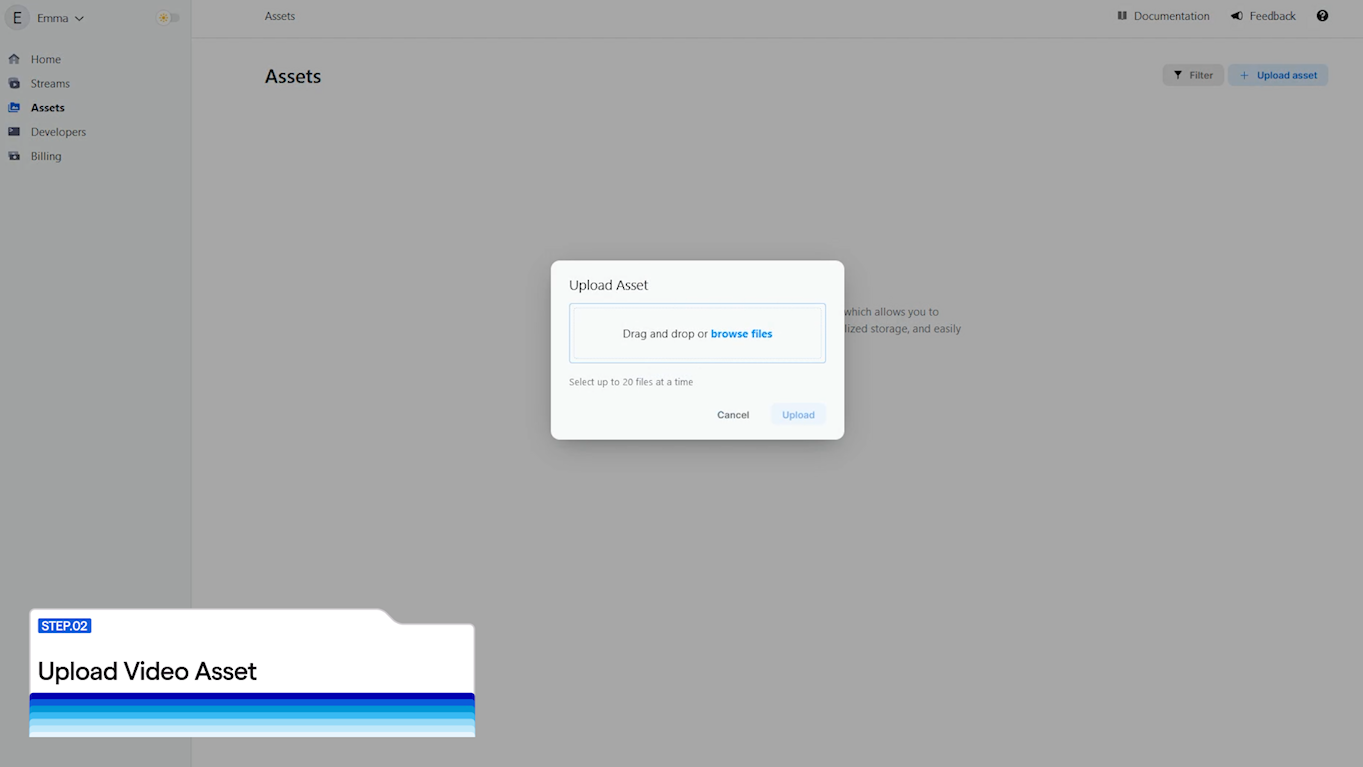
Videos may take a few minutes to upload depending on file size. Do not close the browser during the uploading process.
Step 3: Share Video
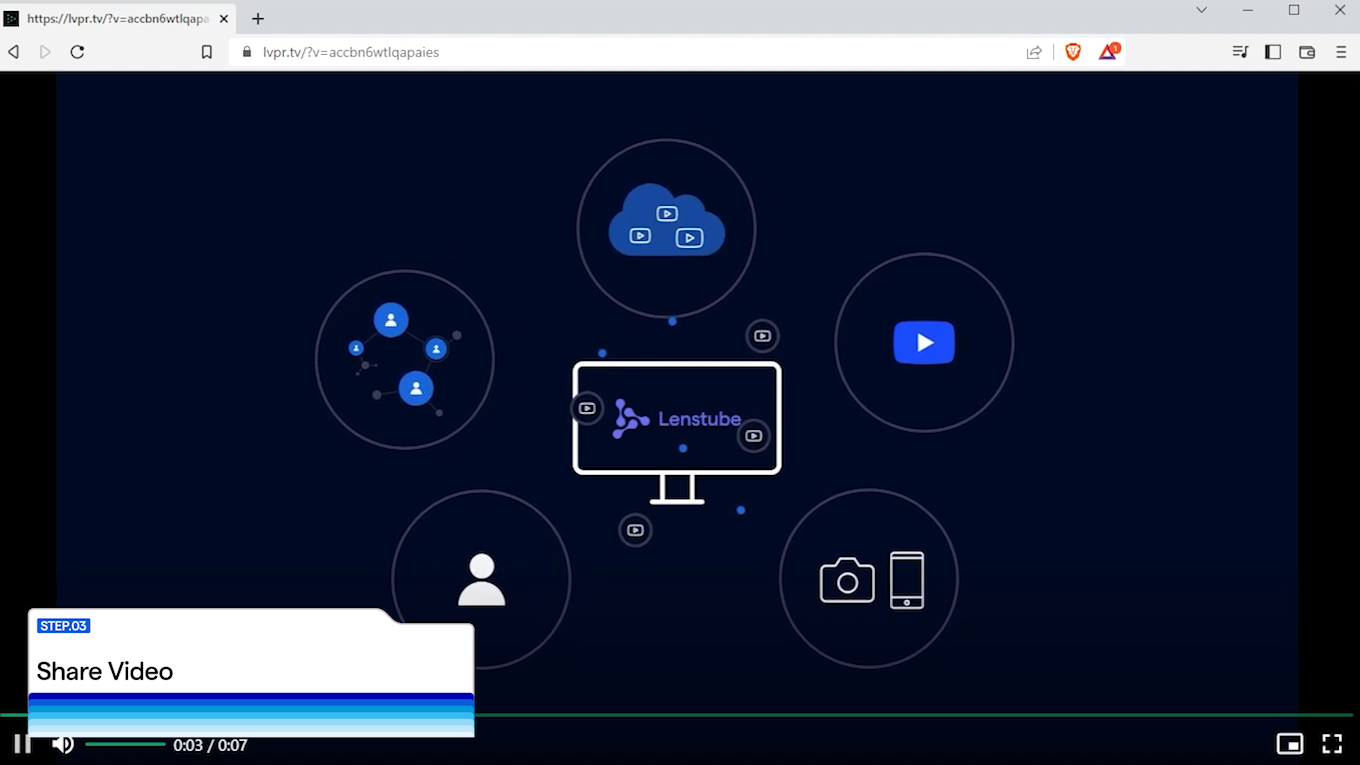
Once your video has finished uploading, it’s ready to be shared. Click on the “Share” button to copy the link or embed your video. When you click on “Copy Link,” the URL will be automatically copied to your clipboard.
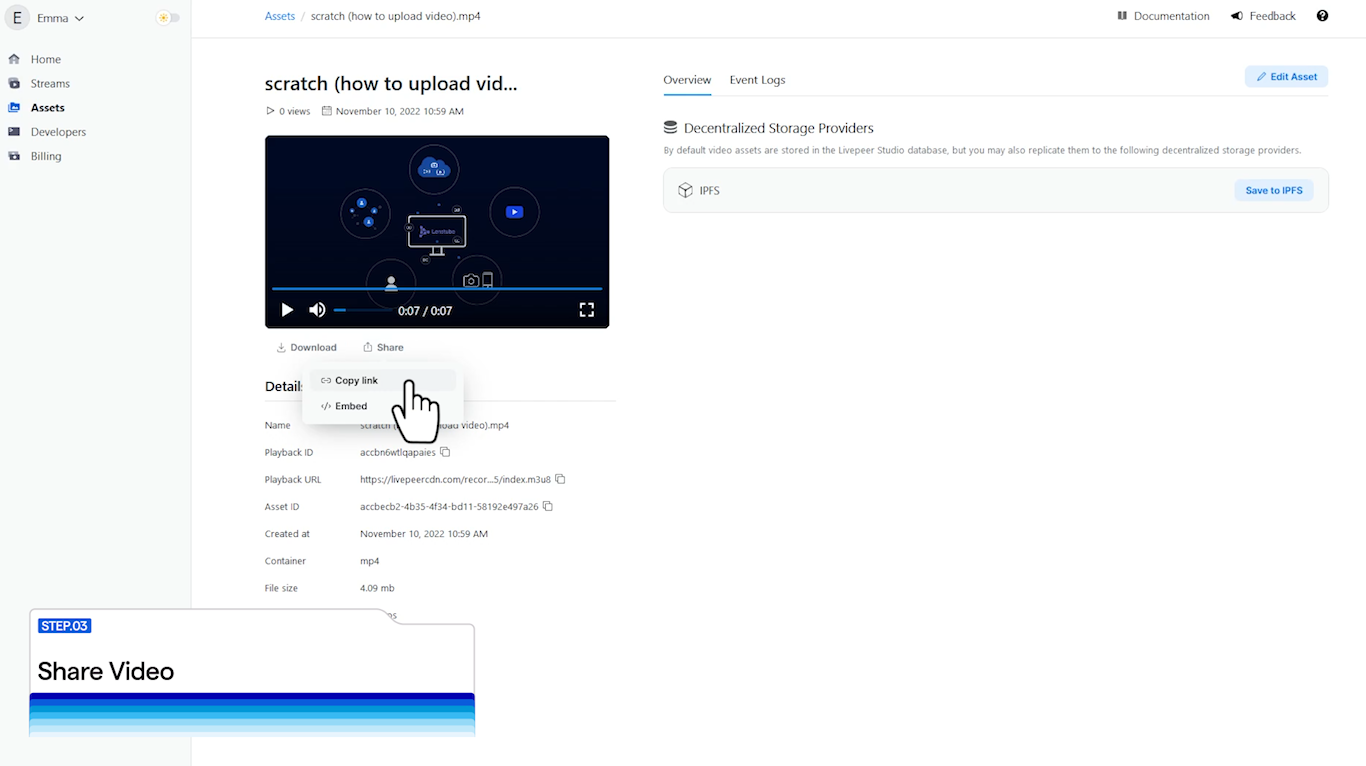
The URL will direct the viewer to your video using the Livepeer player.
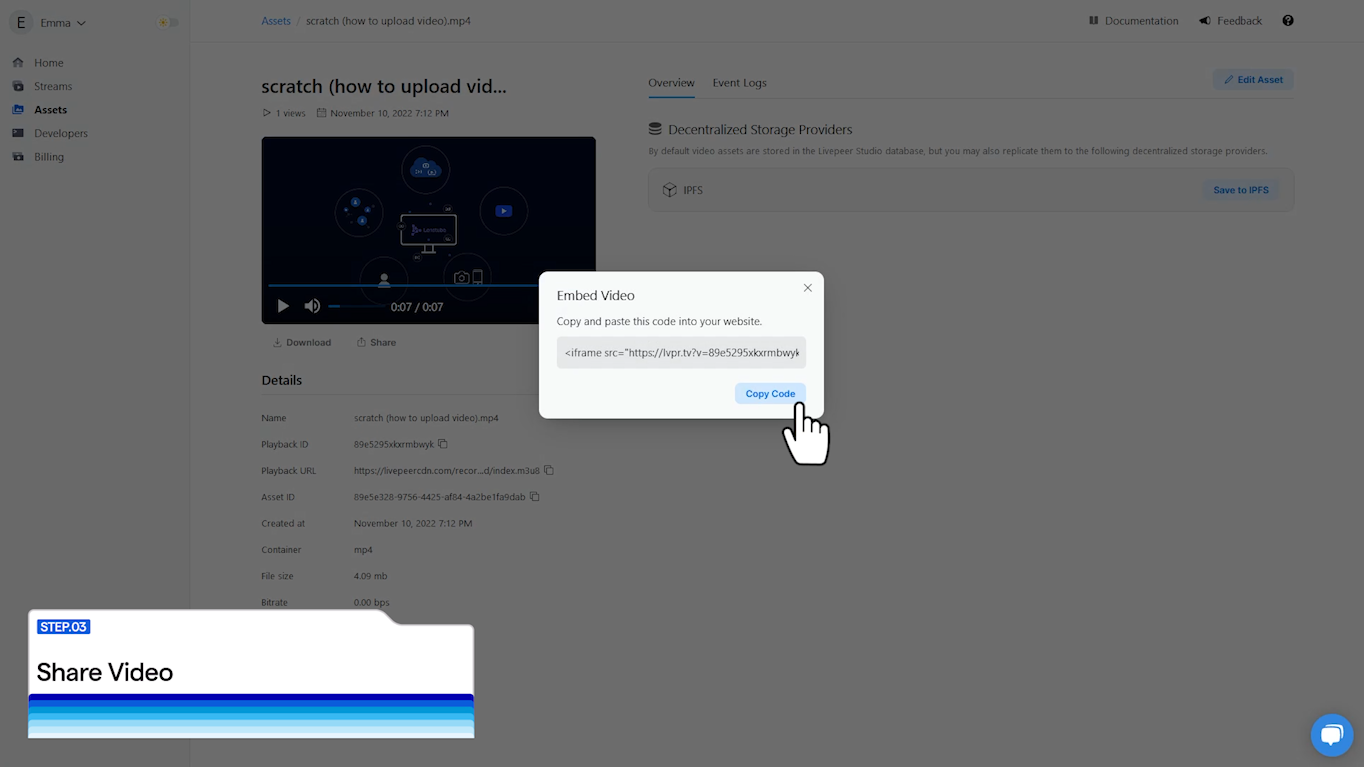
If you would like to embed the Livepeer player in your frontend, click “Embed,” and then click “Copy Code.” The iframe embed code will be automatically copied to your clipboard, and can be placed wherever you would like the video asset to be played.
Step 4: Save to Decentralized Storage (Optional)
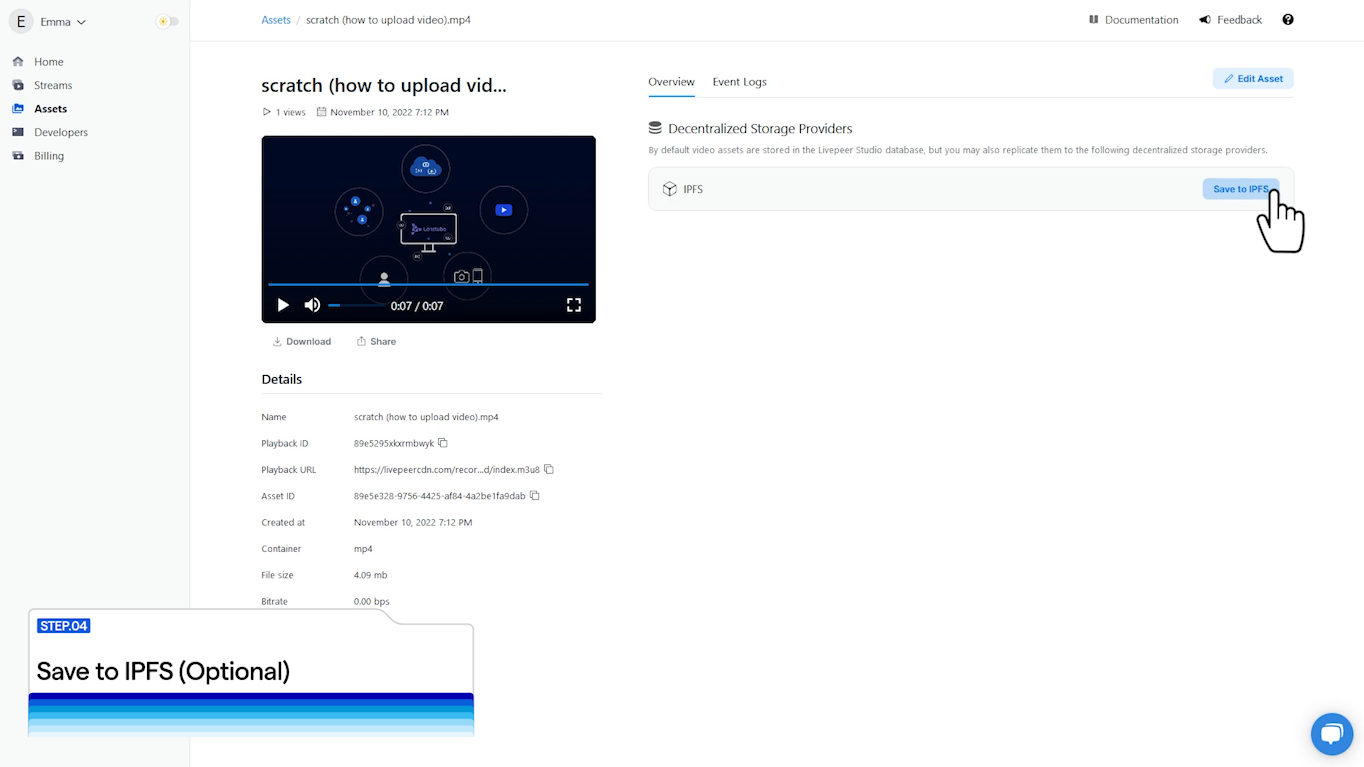
By default, video assets are stored with Livepeer, but they can also be uploaded to decentralized storage providers such as IPFS. To do so, click “Save to IPFS,” and your video will be pinned to the IPFS network.
Step 5: Upload Complete!
You have just successfully uploaded a video to Livepeer Studio, and your video is ready to be shared with your audience.
To learn more about adding video to your web3 app, check out the Livepeer Studio documentation. If you have any questions about integrating video with Livepeer Studio, join the Livepeer Discord and visit #studio-support.